We’ve been hard at work for months now coming up with a curriculum for Kidz Go Tech Session 2.
Here are a few shots of us brain storming during our weekly Tuesday meetings at Safaricom.
After weeks of planning we finally came up with a experiments fit for the session. Here’s a look at our prototyping session.
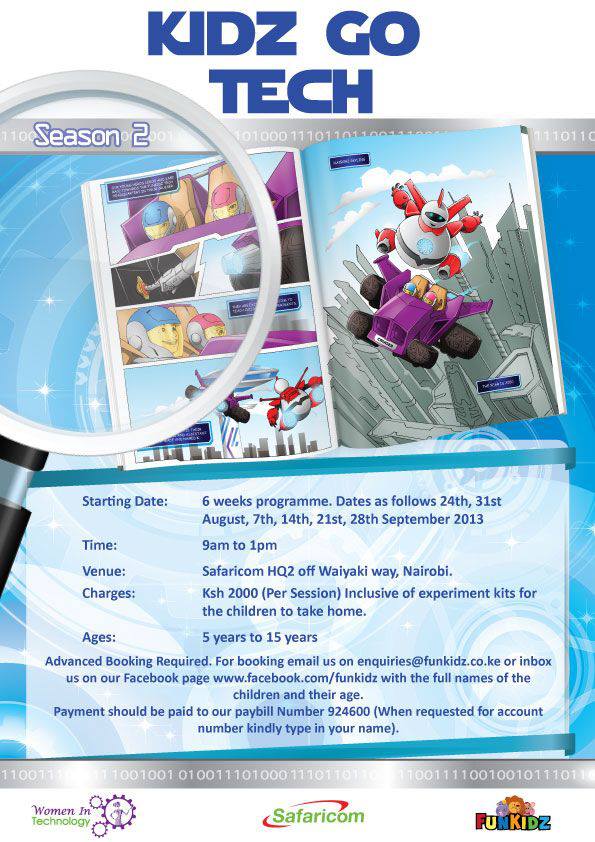
Funkidz Tech Club Season 2 is starting on the 24th of August to the 28th of September. This will happen on the six consecutive Saturdays during that period. Our curriculum is based on our vision of Nairobi 2050, thus the theme “Nairobi 2050”. In the curriculum, we have six concepts, mainly: An introduction session, Lighting, Security, Transport, Funtomatics and Power Generation. Each concept has a set of three experiments that are able to get the children thinking about what really makes up a city. These experiments are based on engineering principles and technology in general to give a more real and futuristic feel.
Marian taking some of the kids through the PicoCricket set
Today was the final session of the six week Fun Kidz Tech Club collaboration with FabLab outreach. As with all good things, we wanted to finish it off with a bang and that we did. The kids started streaming to Safaricom HQ 2 in from 9 a.m. and by 10 a.m, after a few games to get them energized, we separated them into five groups and started off with a brief recap of the PicoCricket and its components (above). With that out of the way, we dove right into today’s theme, an airport. Each group was given a part of the airport to recreate. These were an airplane, a watchtower, a runway, a metal detector, the main airport building and a security perimeter.
Some of the kids building the airport security system equipped with metal detectors
Here is the group of children tasked with making the metal detectors. They used a resistor to confirm the presence of metal, and once the metal was detected, they programmed the lights to turn from green to red and the sound box to sound an alarm. Below is a photo of the set-up with the grey wires connected to the resister used as the interface to test for metal resistance.
Here’s a photo of the metal detector in all its glory
Here’s a photo of the main airport structure.
Airport Structure
Once the kids finished with their particular tasks, they went on a snack break. Shortly after, we were on to the next task, building a paper plane. We divided the kids into two groups with all the necessary materials. Below is Tony taking one of the groups through all the necessary steps.
The kids making their paper planes from scratchThe kids got a chance to customize their planes
As the kids played with their paper planes, some of the FabLab members got to showcase some of the projects they have outside of outreach. This was in the presence of Bob Collymore, Mugo Kibati and other guests. Roy Ombatti’s project is on leveraging 3-D printing technology in the fight against jiggers in Kenya. This involves manufacture of customized and medicated 3-D printed shoes as those ailing from the jigger menace have deformed feet and cannot wear regular shoes. Marian Muthui presented on behalf of her team on their project on transforming the interior cabin of an airplane using bamboo. the other members of the team are Alex Njira, Karl Heinz and Tony Mugita. the bamboo in their project will be specially designed so that a honeycomb structure of bamboo is sandwiched between laminated bamboo panels. Tony Mugita made a presentation on a mini-buggy project that is currently under development in industrial area.
Some of the FabLab members got to showcase other projects they’re in
After the project presentations, the guests got a chance to see what the kids had been up to all day. Below we have Bob Collymore and Mugo Kibati getting responses from the kids on what their watchtower was made off and how it operates.
The kids explaining the parts involved in the construction of the watchtower
Satisfied with their answers, the kids gave a quick demonstration of the revolving radar receiver on the watchtower.
Some kids showing off their awesome watchtower
The next group in line was the one that worked on the runway. Here’s a look at the finished product.
The cool landing strip
The kids talked briefly on the LED lights, batteries, cardboard, coloured tape and copper tape used in the construction of the landing strip.
The kids explaining what their landing strip is made off
Here’s Bob Collymore and Mugo Kibati listening keenly to the kids as the go through the steps they took in its construction.
Some of the kids showing off their cool landing strip
After a few parting words and a closing ceremony filled with cake and snacks, we ended the session on a high note. We can’t wait to for the next one:)
With the 3D printer, we were able to print 3-D names for all the children with their help
Today, we spiced things up by incorporating one of the FabLab 3-D printer into our outreach schedule. By doing so, the children got a peek at the wonders that technology has to offer. With this machine, you can bring any 3-D miniature concept into reality.
The children enjoying a demonstration of the printer hard at work bringing a 3-D model cat to lifeJeremy, Alex and Meryie learning how to make designs that will then be 3D printed.Harris, Rohan, Jeremy, Meryie and Alex hard at workNeema and Rohan enjoying their turn on the 3-D printerAllan and Alex showing their dad what they’ve been up to.Rohan, Allan, Jeremy and Sean coming up with ideas for a new model.
Once the models were created, the children went into their usual groups and started off with scratch while the 3-D printer was hard at work. This week, the kids got down to understanding the Scratch program a little better.
Jeffrey helping Wangari out at her Scratch projectAlex and Allan assisted by Val and JillNeema, Sean and Meryie being guided by Philip on their Scratch programming projectSamoire hard at work coming up with an advertisement on scratch while Michael takes Venessa through the basics
Before the children were able to present their projects, we all sat down and took a break.
Break Time. With some of the work behind us, we all sat down and chilled for a bit.
We had a brief warm-up session to get them into high gear for their presentations.
A little warm up before the presentations
They each presented their games and let the other kids take turns playing them. They joy they got from this is indescribable. With the 3-d printing done, the kids assembled into one group with manila paper, name tags, 3D printed names, copper tape, batteries and LED lights and all made their own customized name tags complete with flashing lights.